How to Design a Multi-Purpose Pool for Swimming, Entertaining, and Underwater Training
Ever thought about building your own pool?
I spent 5 years of real world research on the what, when, and how of building my first pool, then 3 years designing and building. In this article, I’m sharing the biggest things I learned including the design I came up with, what motivated my decisions and some tips and lessons learned throughout the process, plus what I’d do differently on my next pool build.
Key Considerations for Pool Design
When planning my pool, I had four main goals in mind:
- Entertainment and Relaxation. I built the pool at home, so I wanted it to be a place that my family, friends, and myself could enjoy relaxing in. Pools are a magical spot for playing games, hanging out, enjoying the sun, etc. I wanted a space where swimmers and non-swimmers, children and adults, could all enjoy the pool, including just relaxing with a beverage or laying on a lounger.
- Swimming Laps. Of course the ultimate pool had to accommodate regular lap swim.
- Underwater Training. I’m passionate about all kinds of training in the water, and some of the cool stuff requires pool depths where you can be fully submerged at various depths.
- Aesthetically Pleasing. I wanted the pool to look and feel pleasing to the eye. I prefer a style that is both elegant and simple and I wanted the pool to match that aesthetic.
Pool Dimensions and Depths
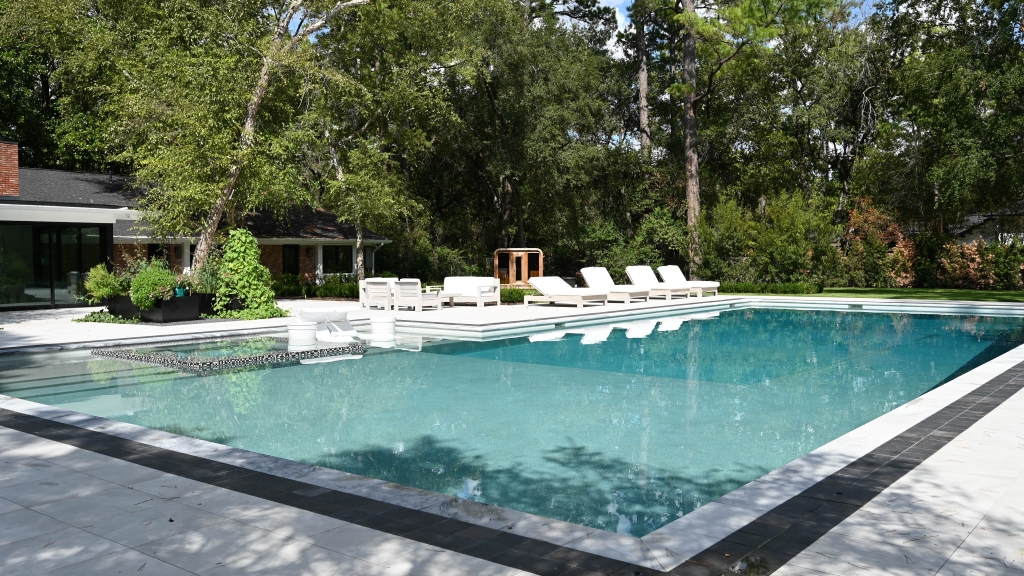
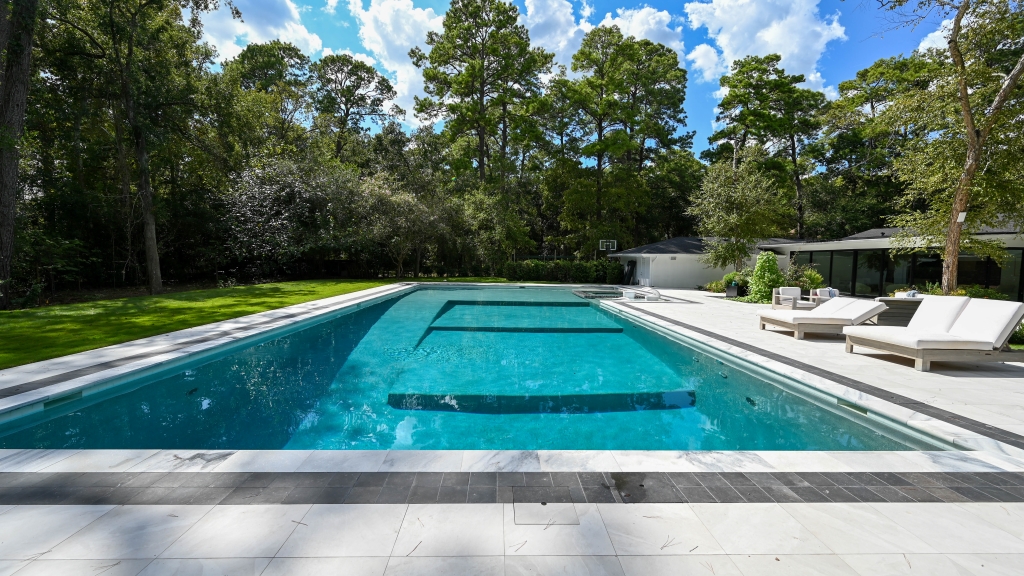
I decided on a rectangular pool with an attached rectangular area containing a hot tub + sun shelf for relaxing. Pool builders can create almost any shape you desire, but this design appealed to me from a simplicity and practical approach. Rectangles are also easier for planning workouts or fitting a pool cover onto.
Here are the pool specifications I picked to balance performance and cost-effectiveness:
- Length: 75 ft. / 25 yards. Minimum standard lap swim length is 25 yards or 25 meters. As a casual lap swimmer, I was happy to value engineer the design and pick 25 yards. Serious lap swimmers might opt to spend the extra money to get a full 25 meters in length.
- Width: 30 feet. This was a minimum width that felt practical for movements across the width of the pool. If money was no object, I would have expanded to 40 feet. It’s a better width for most pool workouts and gives an extra swim late to boot.
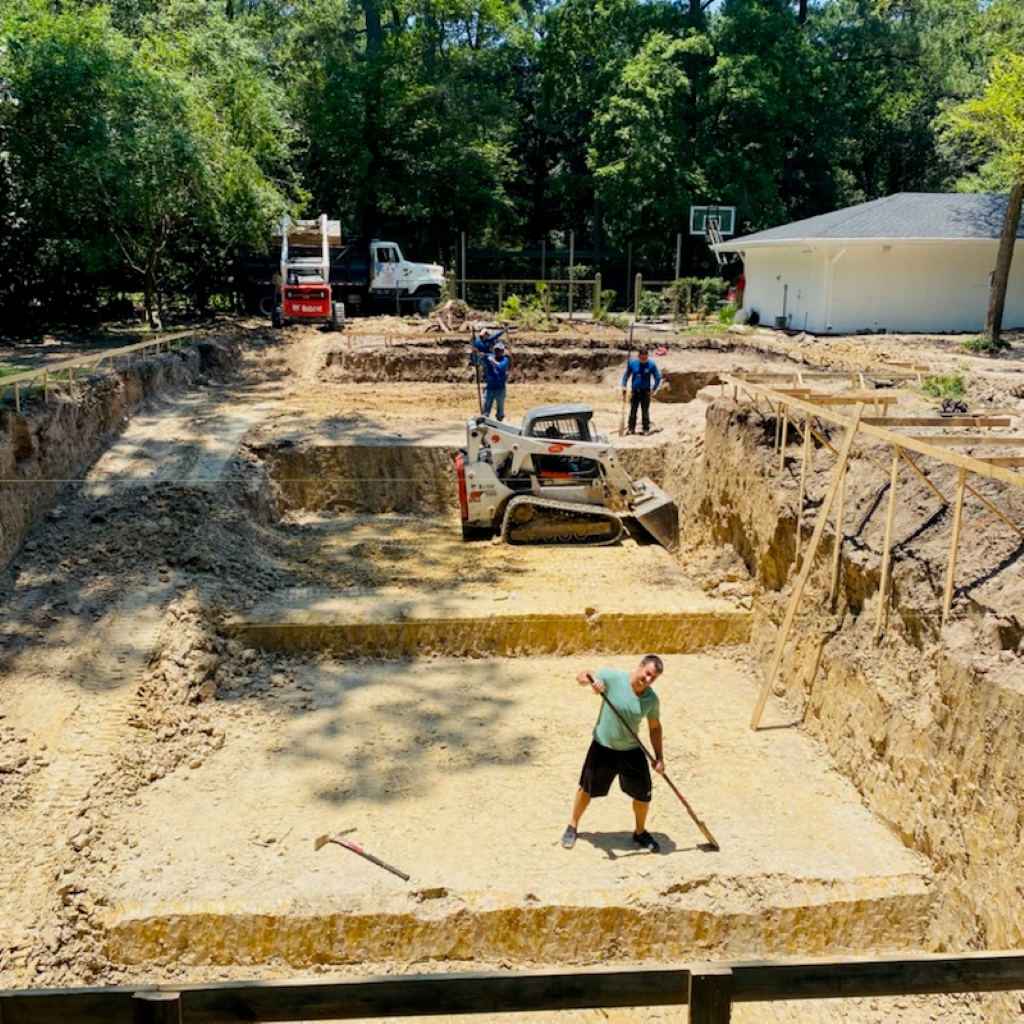
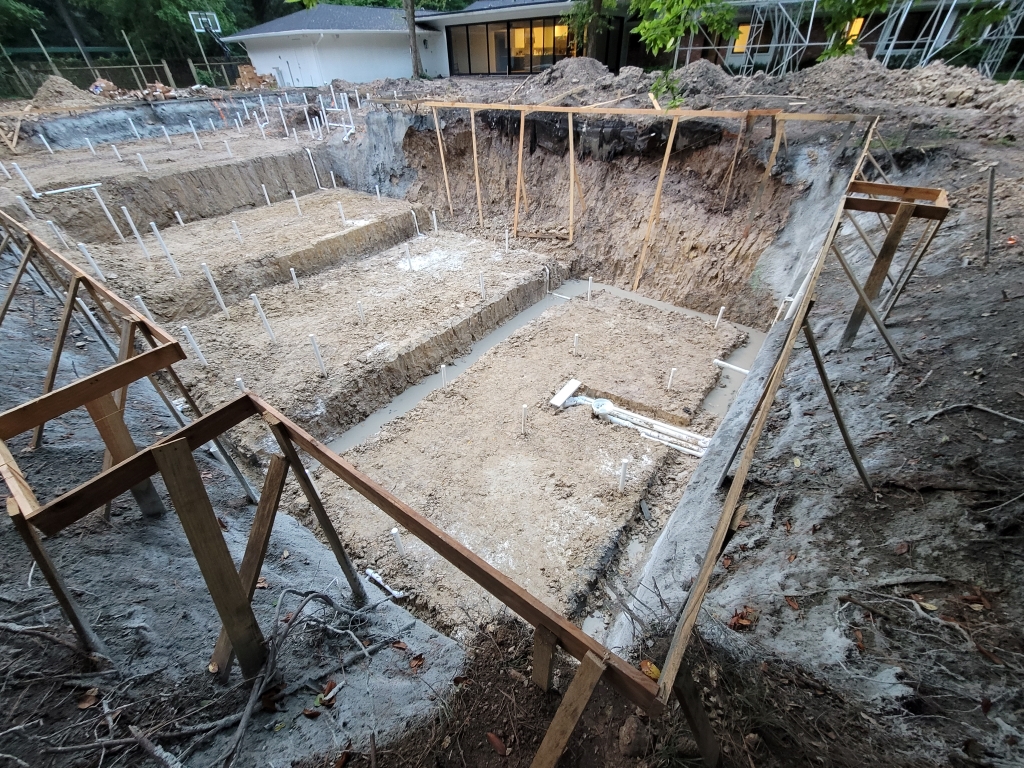
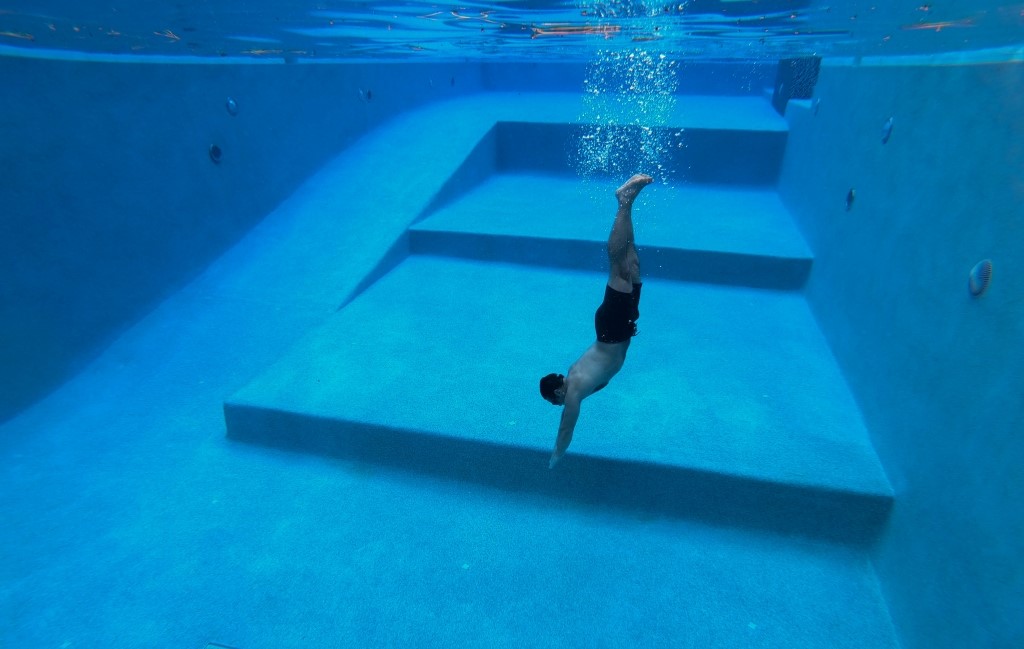
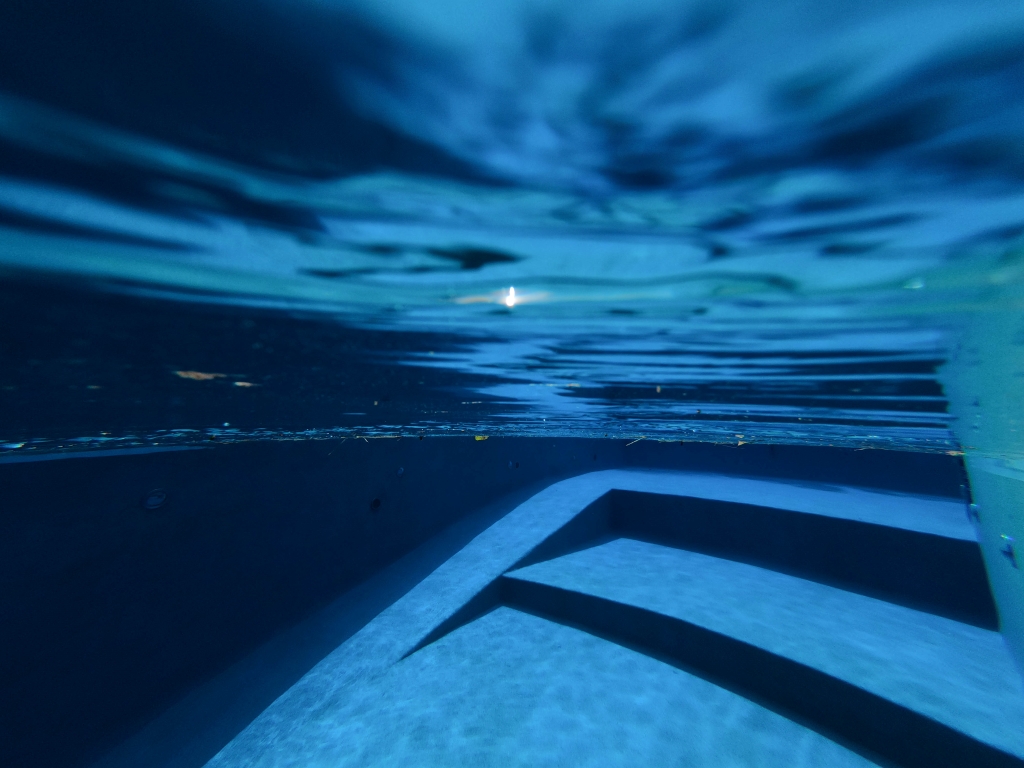
- Depth. I picked a variety of depths to accommodate different usage. Most pools opt for a surface that gently slopes in the shallow end and then heavily slopes into the deep area. I opted for a series of levels that are mostly flat. This allows weights, med balls, etc. to be easily placed on the bottom of the pool without them rolling down. It also provides a uniform flat surface when small groups are training together on the same movement.
- Shallow End: The first 30 feet of the pool slopes from 3.5 ft – 4 ft – essentially flat. This is deep enough for lap swim and all kinds of pool exercises but shallow enough for standing around socializing with a nice beverage in hand. It’s also a perfect depth for pool games like volleyball, etc.
- 7 feet: About 15 feet long. Deep enough that you’re completely submerged, but just barely. This is a very comfortable starting point for under ballistic movements.
- 10 feet: About 15 feet long. Now its starting to feel deep. This is a great depth for more challenging jumps, underwater flips, etc.
- 12.5 feet: About 15 feet long. The deepest section, ideal for advanced underwater movements and challenges. Jumps at this depth are very challenging.
- Ramp. Even though I like flat pool depths for the reasons mentioned above, I wanted a way to easily walk / move underwater from one edge of the pool to the other. For this, I incorporated a ramp that extends from the shallow end to the deepest part of the pool. The ramp is 8 feet wide – big enough to allow two people to simultaneously perform the same activity under water e.g. run weights alongside each other.
Quick aside : This is a big pool! Even if you don’t have space, budget, and/or desire for a pool this big, you can still do amazing workouts in a pool 4ft deep and 20 – 30 feet long. If you want to learn more, message me.
Pool Surface and Finish
For my pool finish, I chose Pebble Sheen. This was a compromise between a coarser finish that offers better grip (Ex: PebbleTec) and a very smooth finish that is also very slippery to walk on (plaster.) Pebble Sheen provides enough grip for workouts. I also really liked the aesthetic of Pebble Sheen.
Coping and Decking
The visual appearance of your pool is heavily impacted by the coping (stone that goes around the edge of the pool) and decking (everything that sits outside the coping.) I picked material that would hold up well in the sun, handle chlorine water well, be stain resistant, and have good grip characteristics to make it easy to walk and exercise around the pool. My tile supplier was very helpful in finding materials that were available in my area and met all those characteristics. Another option I learned about that could be worth considering is stamped concrete.
Underwater Sound System
I got obsessed with the idea of underwater sound early in my research process and stayed committed throughout. I’m really happy I added this in. The biggest downside is cost. Because of cost, very few people install underwater speakers which also means there aren’t many people with expertise in designing or installing the speakers. The main things I learned are :
- Speaker Placement is Important: Sound quality varies depending on depth. The best sound quality is in the 7 to 10-foot range, while shallow areas may not offer the same auditory experience.
- You also need a Sound System. Underwater speakers are expensive, and they’re also only one piece of the puzzle. You still need 1 or more amplifiers and then a sound system to control directing audio to the speakers. Translated, this means that you’re pool builder will be talking to your AV expert so that you finish up with the seamless experience of easily controlling audio from your phone.
- Vendor Availability: Underwater sound systems are niche, so vendor options may be limited.
Chlorine or Saltwater Pools
A big question with pools is how to keep it clean and sanitary. And the biggest question on that front is Chlorine or Salt Water?
Of all the research I did for building my pool, my research on this front was the least satisfying. I went into my process thinking I would definitely build a salt water pool and finished up building a chlorine sanitized pool. Why?
Its important to note that no matter which you choose, your pool is being sanitized by chlorine. Chlorine pools have the chlorine added directly into the water, while salt water pools using a special device that uses electricity to turn salt into chlorine. There’s a natural bias towards salt water because salt water feels softer and less harsh on your skin when you’re swimming.
Having said, there are two things to point out here.
First, most people experience pools in a commercial setting where they are maintained by staff who over chlorinate them in order to mitigate risk. Commercial pools are better off adding too much chlorine to prevent water from being contaminated then try to make the water as pleasant as possible but risk a contamination from high usage, unexpected accidents e.g. kids peeing in the pool, etc. Example : commercial pools love to have 10 ppm of chlorine or more, while a residential or lower usage pool can safely get away with 3 ppm – 5 ppm.
Second, there is more to a how pool water feels than just chlorine levels that determine the overall feel of the pool on your skin e.g. pool pH levels, etc.
Here’s why I picked chlorine over salt water.
- Saltwater Corrodes : Saltwater corrodes equipment, pool furniture, and other items around the pool.
- Saltwater Equipment is More Expensive.
- Chlorine Is Still Required: You may still need to add chlorine to your saltwater pool to complement the saltwater sanitation process. This is especially true if your saltwater system breaks, which they are apparently prone to do.
- Less Expertise w/ Commercial Grade Salt Water. Even though my pool is technically a residential pool, its size is commercial grade. In Houston, TX, there seems to be much less experience with maintaining commercial size salt water pools.
Having said all that, looking into a true salt water system is definitely something I’ll look at more closely on my next build.
Pool Sanitation + Cleaning – Continued
Whether saltwater or chlorine based, you can reduce chlorine use by adding a UV sanitation system and an Ozone sanitization system. Both systems kill certain types of contaminants in the water, requiring less smaller amounts of chlorine to keep the water clean. UV sanitation seems to be a no-brainer if you have the budget for it – almost everyone I talked with agreed they were useful in reducing chlorine usage. There’s less certainty around Ozone sanitation. Most technicians I talked with said they couldn’t tell any difference in chlorine usage from pools with or without ozone sanitation.
Filtration is done using traditional sand filters. They’re reliable and efficient for bigger pools. I also considered the more granular Diatomaceous earth filters. I opted against them because they seem to be best suited to smaller pools (50,000 gallons or less, while my pool clocks in around 140,000 gallons.)
Ensuring Good Design – Structural Engineering + Soil Quality
In construction, trust but verify. This is true for pool building as well. First, you’ll want a builder you can trust. Feel free to message me for recommendations.
Next, you’ll want to have independent third party verification of the critical build pieces. This is probably not as important for smaller pools that follow the builder’s typical template. Its critical for larger projects like this one. I’ll share what I did for this project – pick and choose what makes sense for your project.
- Soil Engineering: A soil engineer sends a drill truck in that cores out a sample of the earth and takes it off to a lab for testing. In my case, we drilled 30 feet into the earth. The soil sample helps the structural engineer decide what kind of structural support the pool will need so it doesn’t shift / crack / etc. In Houston, TX, this is critical.
- Structural Engineer: Most pool companies have their own structural engineer. My preference was to hire a third party structural engineer experienced with engineering commercial size pools. I paid the engineer directly, removing any conflicts of interest between the pool builder and the engineer. The engineer determines things like whether the pool requires concrete piles for support, rebar strength and placement, concrete type, etc, etc. I set the expectation up front with both engineer and builder that the engineer would not only design the pool but also do an inspection of all rebar placement and inspect the concrete pour process.
- Plumbing. Your builder will have their own plumber who installs all piping in the pool. Make sure they have all plumbing pressure tested for at least 24 hours prior to concrete tour (this ensures no leaks in the pipes.)
Other Details
Some assorted other things worth thinking about :
- Install Rope Anchors: These anchors go on either side of the pool and allow you to attach lane dividers. I use these anchors to attach bungees for exercising e.g. banded sprints.
- Install Post Anchors: Installing post anchors is another smart move. This will allow you to mount (removable) posts for volleyball nets, etc. into the floor of your pool.
Final Thoughts
Now its your turn! What’s in store for your perfect pool – I’d love to hear about it! And I’m always here to help brainstorm with you if you need it 🙂